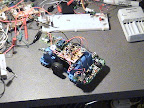
2.11.2008

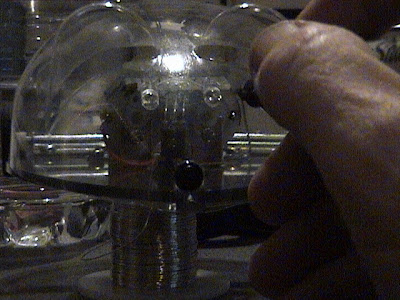
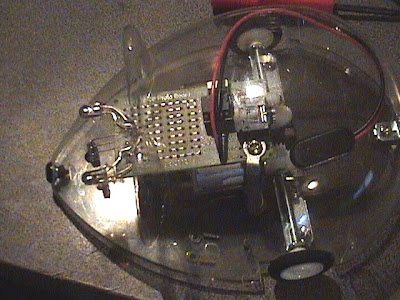
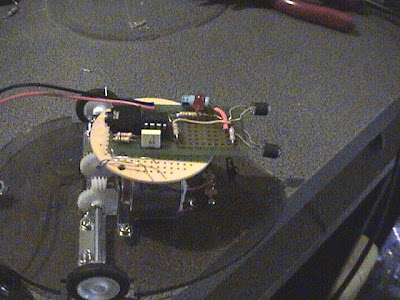
MouseBot Get's Brains - Software

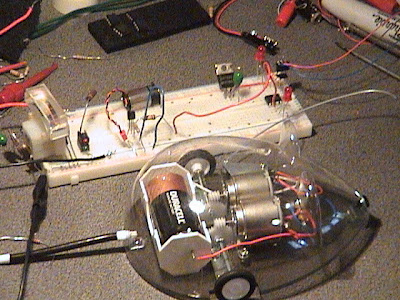
Software for Wall Hugger Action:


Part 5 Software Makes it Go!


This is the basic wall follower software... This software makes the bot turn left to hug the wall, with the values given, you will find MouseBot is FUN!!!

There are routines for left and right turn and the object detection operation as well as a speaker (squeaker) for your mouse. I'm still waiting for the piezo-speaker to come in the mail... I had one, but it was already in use. By using pin0 as a multi-purpose pin, we can add a speaker, which gives us some noise when downloading, but allows the little picAxe m8 to serve of the brains for the BEAM style "Wall Hugging Mouse" conversion to BEAM with BRAINS...

I know you'll want to do crazy things with your bot, so have at it, put the link to your MouseBot with Brains video so we can all see it...

' ------------------------------------------------------------
' BEAM bot Brains
'
' Basic Operation of mouse as "wall hugger" just like original
' Except for:
' IR detector "whiskers" lets the mouse find it's way
' Follows walls without physically touching
' Still has basic motor control with microcontroller picAxe m8
' Copyright 2008 Jim Huffman
' Permission granted to experimenters to use all or part
' Note copyrighted material frequency chart at the end


' Basic Interpreter Directives
#picaxe 08m


' Microprocessor pinouts and layouts 08m
symbol LED = 0 '(leg 7) Serout/LED
symbol rightDrv = 1 '(leg 6) High = motor on
symbol pout = 2 '(leg 5) PWMout2
symbol IRin = 3 '(leg 4) Input only pin3
symbol leftDrv = 4 '(leg 3) High = motor on
' (leg 1 Vdd, leg 8 = Vss, leg 2 = Serial In)
symbol spkr = 0 'extra symbol, speaker drive

' Variables used in program
symbol xCnt = b0
symbol rightDrvFlag = b1
symbol leftDrvFlag = b2
symbol objDetFlag = b3
symbol rightDrvTime = b4
symbol leftDrvTime = b5

init: ' Initialize chip so OK with low Vcc supply
disablebod
setfreq m4
' flash LED
high LED
pause 1000
low LED
pause 1000 'wait for Panic resets, etc...

' initialize variables
leftdrvTime = 120 ' Permits balancing forward motion
rightDrvTime = 100 ' allows motor speed balancing
low rightDrvFlag, leftDrvFlag, objDetFlag, xCnt ' initialize values


' Main driving loop avoids walls
main:

gosub driveforward
pause 10

goto main


' Move forward one time after the other - makes mouse wiggle
driveforward:
gosub objDetect 'makes 1/2 wiggle unless there is an object
' the other 1/2 wiggle even if there is a wall
high leftDrv
pause leftDrvTime
low rightDrv,leftDrv 'stop\
pause 10
return

' Driving commands (turns) stick in the appropriate spots
turnRight:
high rightDrv
pause rightDrvTime
low rightDrv,leftDrv 'stop
return

turnLeft:
high leftDrv
pause leftDrvTime
low rightDrv,leftDrv 'stop
return

' If an object is "sniffed out" then set objDetFlag high
objDetect:
pwmout pout, 22, 50 '25, 52 ' 26 usec period = 38.4 kHz
pause 3 ' Begins continuous output PWM

if pin3 = 0 then ' Object Detected
pause 3
pwmout pout, 0, 0 ' stop the continuous pulse output
else
' 1/2 wiggle (unless there's a wall)
high rightDrv
pause rightDrvTime
low rightDrv,leftDrv 'stop
pause 10
endif
pwmout pout, 0, 50 ' stop the continuous pulse output

return


MakeSound: ' fast-beep make a squeek...
setfreq m8 'kick into high-speed mode
for xCnt = 100 to 130
pulsout spkr, xCnt
next xCnt
low spkr
setfreq m4
return


' Chart of frequencies courtesy of PHAnderson...
'------------------------------------------------
' From IR_1.Bas
'
' copyright, Peter H Anderson, Baltimore, MD, May, '04

'
#rem ' PWMOut pout, Period, DutyCycles
PWMOut pout, 25, 52 ' 38.4 kHz
PWMOut pout, 24, 50 ' 40.0 kHz
PWMOut pout, 23, 48 ' 41.6 kHz
PWMOut pout, 22, 46 ' 43.5 kHz
PWMOut pout, 21, 44 ' 45.5 kHz
PWMOut pout, 20, 42 ' 47.6 kHz
PWMOut pout, 19, 40 ' 50.0 kHz
PWMOut pout, 18, 38 ' 52.6 kHz
PWMOut pout, 17, 36 ' 55.5 kHz
PWMOut pout, 16, 34 ' 58.8 kHz
#endrem

2.08.2008

MouseBot Is Quick! Powerful Motor Driver Transistors

Beefy Motor Driver Transistors - Makes MouseBot Move Quick. Like a Mouse!


Part 4 Wall Follower Mouse 'Bot Transformation

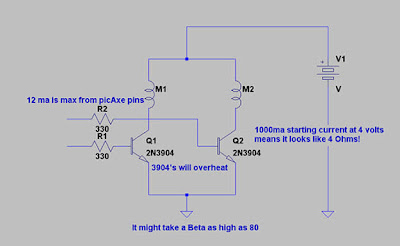
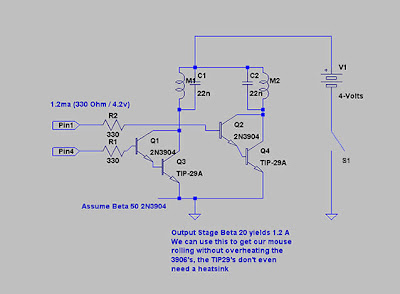
Hold on, last time we said we would add some gumption to our MouseBot. We will accomplish this feat while reducing the power disapated in those little innocent 3904's... Basically, this means we don't melt our Mouse's head...

From Mouse Bot Tra...

While the concept is covered in this schematic, the real-world shows that these motors are drawing a lot of power at startup, this overheats the 3904's, so far this means we've only been testing MouseBot... It's time for this robot to distribute the power to another transistor to stabilize the smaller transistors. This is going to allow MouseBot to do all sorts of things..

From Mouse Bot Tra...

MouseBot gets really real after you put in the TIP-29's (or whatever lives in your junkbox)... Now the mouse scoots so fast, it seems a little nervous, like it's biological counterpart...

For the issues and tricks, here's what I did:
  • Mount the Power Transistors right down at the motors, if you bend them like wings, you can connect to their bases and feed power directly from the on/off switch
  • With the batteries I'm using AA-1700 mah, you have to turn off brown out protection to allow the processor to go under 3 and 1/2 volts or so, you also need to keep the batteries fresh
  • The four battery clip is a little large and collides with the top of the back, shim it in the back so it leans forward, that works.
That's it!!

Have fun programming your MouseBot!!!

2.06.2008

MouseBot Electronic Motor Control

MouseBot Electronic Motor Control


Part 3 Wall Follower Mouse 'Bot Transformation


Let's put the ram in ramalamadingdong!

First Ya Need a Motor... Pretty much any-old hobby motor will work here. In Mousebot, we have not just one motor, but two... That means, of course, we can steer mousebot... That's how he works in the first place, using two motors, one that steers "into" the wall, and other that pulls mousebot forward into the open spaces...

We have our mousebot whiskers ready to go now (see blog) with a cool object avoidance system overseen by a picAxe m8 8-pin processor. By judicious re-use of pin0 for running the redLED in MouseBot's head and a piezo noise maker, we have two pins left over...

That means we could use one pin to turn on one motor and with two pins, this is most promising for MouseBot... Let me show you:

From Mouse Bot Tra...
This is electronic motor control in its most basic form. When the microcontroller output pins go high, they "turn on" the NPN transistors and large currents run through the motors. If the motors are working too hard, you just reduce the duty cycle, that is, you pulse the motors with a signal where you control the ratio of off/on time.

MouseBot's simple driver will not be able to back up, but, MouseBot can stop on a dime, and can turn on it's motors independently of each other, like this:

' System resources 08m pinouts and layouts
symbol LED = 0 '(leg 7) Serout/LED
symbol M1 = 1 '(leg 6)ADC1
symbol pout = 2 '(leg 5)ADC2,PWMout2
symbol IRin = 3 '(leg 4)
symbol M2 = 4 '(leg 3)ADC4
'(leg 1 Vdd, leg 8 = Vss, leg 2 = Serial In)
symbol xCnt = b0

'
high LED
pause 1000
Main:
low LED

pwmout pout, 22, 50 '25, 52 ' 26 usec period = 38.4 kHz
' for 40 kHz, use pwm IRsignal, 24, 50
' MAX Range about 4-5 ft 26, 50
' 3ft 27, 50
' 6" (closeup) 18, 40
' 2" (eXtreme closeup) 10, 40
Pause 3 ' Begins continuous output PWM


if pin3 = 0 then ' Object Detected
high LED
low M2
pause 1000
' go do things...
endif

gosub driveAround

pwm pout, 00, 00 ' turn off the PWM
Pause 100
GoTo Main

driveAround:
high M1,M2
pause 100
return

So the software controls the MouseBot's motors as it runs around... As shown in the test Run listing above. There are lot of things wrong with this piece of code, it makes no effort to make the motor run with any efficiency or multiprocess the motor and the picAxe simply by using an interrupt driven system. Those improvements will come later, the whole idea here was to add a picAxe to the Wall Following Mouse Robot. Since we have enough pins to do the object detection, it was decided to use the two extra pins to control MouseBot.

Let's add the transistors shown like in the conceptual schematic shown... Then the whole Mouse Bot project is done, though ol' Mousey will never go backwards. Most mice I've dealt with ran forwards anyway, of course that could be because a pack of humans with brooms and loud screaming voices were after them...

Finished!

From Mouse Bot Tra...
In an odd way, I'm kinda dissapointed because I've been "intending" to do this conversion for so long, now that its done I don't have much to blame myself for, so I'll have to take on another project, like making some sophisticated software for MouseBot, maybe with random number generators. Also, I can't wait to use the sensitivity controls, I love being able to shift the frequency from the IRLED and control how "far away" MouseBot stays from objects...

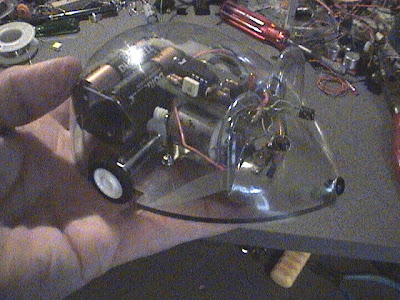
Closeup:
From Mouse Bot Tra...

Hardware Finished... Of course, the software needs fixin' I'll get to that later, I can usually cram a few hours of programming in more easily than a few hours with the hardware. And, software is really all that's left to extract the most fun from the MouseBot...

Mouse Bot Rules!

If you try this test, you will notice MouseBot gives up the ghost very quickly... This effect is caused by driving the 2N3904's too hard... Don't run it this way other than short tests, or with the body off the robot... You'll melt MouseBot's head!

But wait! All is not lost! We have the next (and hopefully, final) episode in the transformation of the wall following robotic mouse: Next Time... A non-melting drive system....

2.03.2008

MouseBot: How to Make an IR Object Detection System

MouseBot: How To - IR Object Detection System!


Part 2 Wall Follower Mouse 'Bot Transformation


The Nose Knows...

Last time we took the little mousebot down to it's skeleton, let's put something back. We want our mousebot to look around without actually touching things. It's a solid improvement to the wall follower, it's a good robotics first step and it involves something almost every roboticist has to face: Object Detection and Avoidance. We will use Infrared (IR) generators and detectors to give the wall following mouse a touchless interface to the wall.

Let's make an IR Object Detection system. While we intend to use the module in our little wall follower mouse upgrade, anyone can use it for any "bot." Basically, it's pretty simple if you have the right attitude about just how much functionality to expect from the microcontroller chip you use.

The little teeny 8-bit pic microcontroller in the version of the picAxe chip seemed a fun choice and could give us a whole load of ideas about how to make it even cooler...

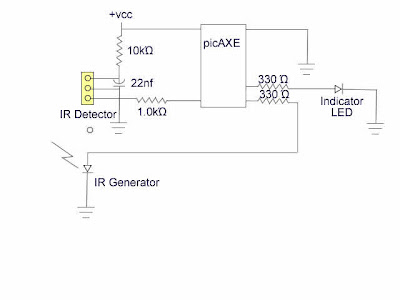
Basic IR detection circuit:

Here's the diagram of the nose test circuit...


From Mouse Bot Tra...

Driving the IR LED is easy with most chips, AVR, Stamp module, everything you can imagine, but with the m8 picAxe, there's only one way to do it... While that way is pretty neat, you gotta dedicate the whole chip to giving our mousebot the nose to end all noses. That's just what we do in this project. Give the picAxe one job to do and expect it to do that job well...

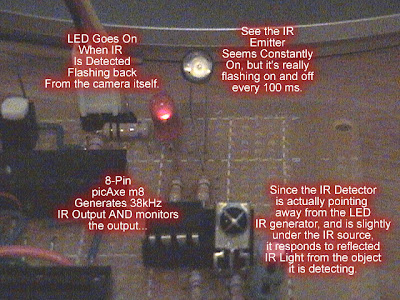
This mouse's nose will have an m8 picAxe chip driving any one of a handful of IR 3-pin IR detector modules while supplying it's own 38 kHz signal to the IR detector... The issue is that when you drive the modulated IR LED you can't stop sending while you check the IR detector because you'd have to shut off the IR you are generating... The m8 picAxe has a pwmOUT command (in Basic) which switches on and continues to run while the picAxe goes on to other instructions...

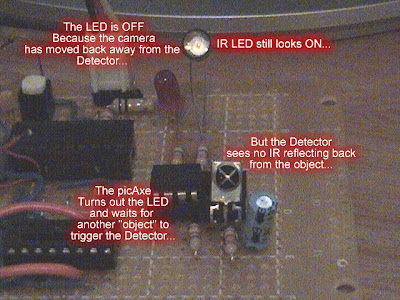
You guessed it, we start up the IR LED, then let it run while the processor takes a peek at the IR Detector output... In our case, if the detector input goes low (meaning it picked up the reflection of an IR signal from the LED, the m8 responds. In this example, it simply turns on an LED, but in the mousebot, it could tell the other motor to run, so it would turn mouse bot away from the refected signal. Without the reflected signal bouncing off the wall, the mousebot motors flip around and the motor switches so the power is applied to the wheel until it turns again and again, wiggling its way along the wall, just like it did before we cannibalized it.
From Mouse Bot Tra...

After all that, we intend to get the little mouse bot running without touching the walls, but performing only the simplest function... Wall Following... Since we have a microprocessor running the nose, we might as well take advantage of this by adding some sophistcated features... Like variable sensitivity...

If you drop mousebot in the middle of a big room, he needs to be able to find a wall to follow, so, by using the picAxe, we detune the IR LED's output signal so it still stimulates the IR Detector, but has very little of the power... Thus we can use the sensitivity of the "nose" to determine how far away from the wall the mousebot will wiggle along at... Oh boy, now the little guy can use the smart nose to enhance it's capability and justify the four bucks spent on the picAxe...

We will still have motor control to deal with when we finish this project, but knowing where you are going and what you are looking at will go a long way to improving the Wall Following Mouse Robot...

And here is the code for the test circuit:

#rem
PWMOut pout, Period, DutyCycles
PWMOut 3, 25, 52 ' 38.4 kHz
PWMOut 3, 24, 50 ' 40.0 kHz
PWMOut 3, 23, 48 ' 41.6 kHz
PWMOut 3, 22, 46 ' 43.5 kHz
PWMOut 3, 21, 44 ' 45.5 kHz
PWMOut 3, 20, 42 ' 47.6 kHz
PWMOut 3, 19, 40 ' 50.0 kHz
PWMOut 3, 18, 38 ' 52.6 kHz
PWMOut 3, 17, 36 ' 55.5 kHz
PWMOut 3, 16, 34 ' 58.8 kHz
#endrem

' System resources 08m pinouts and layouts
symbol LED = 0 '(leg 7) Serout/LED
symbol io1 = 1 '(leg 6)ADC1
symbol pout = 2 '(leg 5)ADC2,PWMout2
symbol IRin = 3 '(leg 4)
symbol io4 = 4 '(leg 3)ADC4
'(leg 1 Vdd, leg 8 = Vss, leg 2 = Serial In)
symbol xCnt = b0

'
high LED
pause 1000
Main:
low LED

pwmout pout, 14, 40 '25, 52 ' 26 usec period = 38.4 kHz
' for 40 kHz, use pwm IRsignal, 24, 50
'
' MAX Range about 4-5 ft 26, 50
' 3ft 27, 50
' 6" (closeup) 18, 40
' 2" (eXtreme closeup) 10, 40
Pause 3 ' Begins continuous output PWM


if pin3 = 0 then
high LED
endif


pwm pout, 00, 00 ' turn off the PWM
Pause 100
GoTo Main


Invisible Whiskers


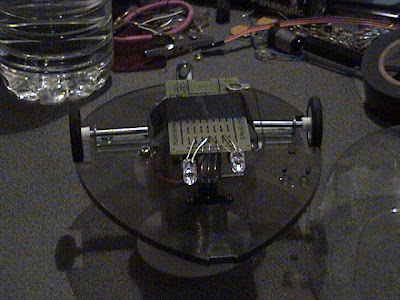
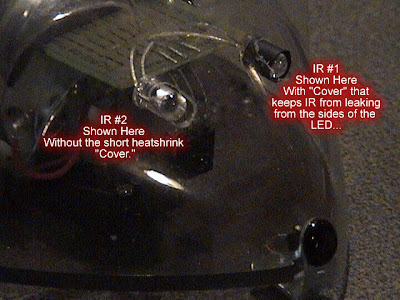
MouseBot is ready for it's "sniffer" or infrared eyes... First we tape down the pc board that will hold the IR LED's that will make the mousebot eyes...
From Mouse Bot Tra...


Now with everything in place, make a couple of marks where the eyes will be...
From Mouse Bot Tra...


From Mouse Bot Tra...

Now we have two eye-marks which we plan to drill out so the IR LEDs protrude from the mouse body... Kinda like little mouse eyeballs... But remember, these are not sensors, these are generators... It's the NOSE that counts, the IR Detector lets the Mouse "sniff" around basking in reflected IR from the eyes...

It's time to fire up the drill...
From Mouse Bot Tra...

Now this bot's got eyes...
From Mouse Bot Tra...

Almost time to solder, except we need to make a decision about just how much we want this version of mousebot to do... If we need rudimentary motor control, that means one thing, for a more exotic motor control, we'll use another picAxe, this one dedicated to moving the mouse's body around...

From Mouse Bot Tra...

Now the soldering is complete!

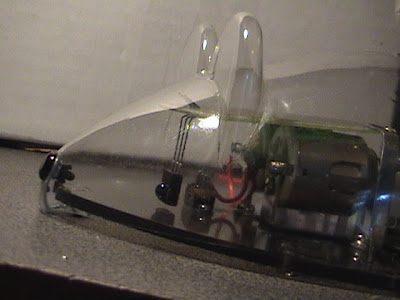
Oh boy, this means I'm ready to enclose our Infrared Object Detection system into the MouseBot body to make sure the experiment worked, remember IR Detector on the Inside and IR generator LED on the outside of the body?

So I crammed everything into the mouse body and Voila!


Next Step? Well, let's hookup some rudimentary Motor Control for the MouseBot so it can go run around the floor..

2.01.2008

Mouse Bot Transformation

Wall Follower Mouse 'Bot Transformation


Part I. Transformation Begins:


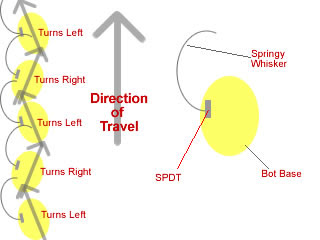
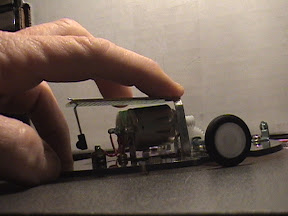
At last I've begun to transform the little wall follower mouse into something a little smarter... The mouse bot is pretty cute, and simple... The mouse itself is a BEAM robot, that is, it simply consists of a SPST switch with a long "whisker"... When you turn on the bot, immediately one of the motors starts to run...

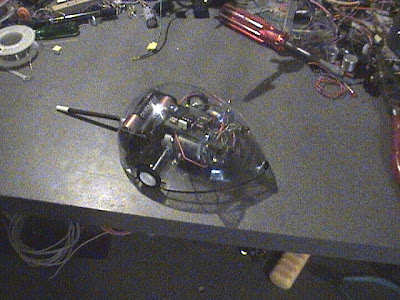
You can see the whisker extending from the body of the BEAM bot in the picture:
From Mouse Bot Tra...

You can see the whisker at the top of the photo...

So the motor is on, the mouse turns "into" the whisker, then the whisker contacts the wall, the SPDT switch throws and Voila! We turn off the left motor and turn on the right motor which pulls the mouse away from the wall, then the whisker unbends, and the SPDT switch action, you guessed it: Fires up the left motor again.
From Mouse Bot Tra...

The result is the mouse runs along against any "wall" and follows the wall, wiggling from one side to the other thus simply pulling itself along this way... Until the Battery runs out... It's a C-Cell - - You're going to have a long wait with each motor pulling only about 50 ma with roughly a 50% duty cycle...


Let's Gut This Mouse!


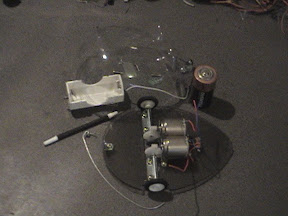
Don't worry, it's not going to be as messy as your old biology class... (Nor as sickening.) We need to strip the mousebot down to its essentials and make sure everything is going to fit together the way we hope:

From Mouse Bot Tra...


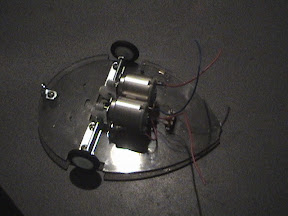
The wall follower taken to it's skeletal self:


I made a bracket from some electrical interconnect tabs which are about an inch long, drilled and rounded on each end. These are easy to bend. So I can check to see how the proposed pcb will mount.


From Mouse Bot Tra...


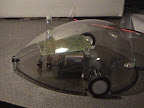
Now I put the cover over it to guesstimate whether or not it will all fit together


A closer View:

From Mouse Bot Tra...

Whoo Hoo! It looks like everything will fit...

Now my hopes are high for this project!

It's time for the high tech stuff... We've stripped down our Wall Follower mouse robot and we are ready to add some fun stuff!

We start with the nose... See next post for object detection...

1.27.2008

TrakBot a Track Driven Robot Base

Track robots are the coolest! They are also a kind of pain in the butt. Tracks keep falling off, the cheap ones get squalling gears that need a lot of grease. But they are worth it! There is nothing more fun than watching these tracked bases grind their way over obstacles...

So I had to build a track robot!

I started with the Tamiya Base unit - A little motor with switchable batteries that goes forward and backward. This was back when I was buying a collection of little simple bots to see how well they got around. It wasn't long until I wanted some smarts to the motion and I bought a microrobot wall follower. It had an IR detector so it didn't have to bang into things, and could zoom along, but only forward and it could only turn in one direction. But it could follow walls.

So I added the dual drive Tamiya for 10 bucks. Now I had a spare gear drive... I kludged on the IR detector from the microrobot and voila! Now my track drive got a life of it's own... I would call it TrakBot!


This was good! This was fun... But now I had seen the famous Parallax Stamp powered bots and they would run up to something and stop, make a decision or two, then move on. This called for brains!!!!

I ordered a picAxe m8, m14, and 18x... Hmmm... The 18 x running the TrakBot??? Seemed like a good idea. Here are the first test results...


Oh Boy! This was too fun! By now, a zillion other experiments had introduced me to the Sharp Distance Measuring Devices. One of these babies and the TrakBot could be pretty darn smart when it came to avoiding obstacles. Oh yeh, and there's the little matter of doing it all with an m8 picAxe and Motor driver. You can get all this on a pre-soldered board for less than $20 USD, so it's only logical. The results:


This is my funnest robot. I've got about $50 USD in it, but it has a lot of "think" power, and, it's a lot of fun. Here's the scoop on this bot in video form

1.25.2008

BEAM Bot Inspired Fun Quick DumBot!

I strapped a couple of batteries on a gearbox with motor and voila! I had a BEAM bot!
This thing is dumb, it's wheels are square stiff wire, but it's really fun and a favorite around the robot lab. This is disgusting, because now I've got every imaginable robot around here, but by far the favorite is this dumbot!

So I've obtained another Tamiya Twin Motor Gearbox and I'm thinking about a BEAM bot with a little more smart than a nervous net :-) We'll see...

HexBug Busted Open

A crazy little bot called HexBug...


When it goes, it goes like this... Forward motion until the feeler touches something which reverses the motor. When it backs up, the motor has a clutch that causes one leg to not move in reverse. The net effect is when the bug backs up, it turns, thus a simple object avoidance algorithm runs without a control computer to make it happen. I almost forgot, there is a clapper in the HexBug. Yeah, just clap and it reverses, whether it hits something or not. I forgot to show that in the video.

But of course, I'm thinking of adding a picAxe or equivalent microcontroller!

Avoider Robot PLUS mods

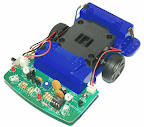
The avoider robot is a cute little wall-following, object avoidance robot around $35 USD retail. Well, cute is about it. With a wonderful set of IR "whiskers" the thing as it comes from the factory moves only forward.

How the Avoider uses IR.

Like I said, it is setup to run both motors from its supply voltage (four AA's inside the case.) When it sees an obstacle, one of the motors is shut off by the IR detectors. I can't remember which direction it turned when it came "out of the box", but it is easy enough to swap the motor connections so it turns the other direction.


Figure 1. The Avoider Microrobot is a cute little guy.

At the time I was learning about Motor Controllers, so I decided to grab a handful of 2N3904's and 6's and made my own motor control. Now I could tell the little bot to go forward and backwards, just by setting the right pins high.


Next enhancement had to do with adding a chip to control it all. I first tinkered with NE-555's and other chips, but in my heart I knew I wanted to use a Microprocessor, so I looked around and decided to spring for the PIC chips with built-in BASIC interpreter - picAxe was the choice. I liked the 8 pin package and that gave me plenty of outputs and one input pin to drive an interrupt. The result? It looks pretty ugly, but it's one of the more reliable "bots" sitting around here.

Scribbler vs TrakBot

I got a Scribbler robot for around $80 USD at Fry's

I took it home, put it down on the lab floor and let it run the same kind of course I let all my robots run around in... My Lab, and the Outside Deck.

The scribbler was an "out of the box" disappointment because:
1. It's range finders are set too high to work well in my Lab/Office, it worked OK, out on the deck.
2. It backs up and seems to get stuck backing up. (Unless you are outside. It needs several feet of freedom.)

BUT!!!! The scribbler is programmable! So after hacking the demo code, I found if you shift the frequency of the Infrared Generators, I could cut the sensitivity. After playing around with the time of running, how long it backs up, and stuff like that, I got it to run pretty well.

Out of the box, the Scribbler is a lot less fun than the TrakBot, but I'll let you judge for yourself.


Figure 1. The Scribbler Robot "Out of the Box" experience

Compared to the Scribbler, TrakBot found it's way around nicely. Because it uses the Sharp IR send/reciever pair, it works better in sunlight, or bright room lights. And, best of all, TrakBot sees most black objects as well as any IR combo I've played around with.


The Scoring Points: (In no particular order)
Fun Factor - Does it get around the area and find it's way around obstacles?
Stuckness - Does the bot get stuck easily (higher number means worse score)
Smartness - Can it get out of jams easily
Potential - What can you add to the bot?
Jam Factor - Another term for Stuckness.
Autonomy - Degree of human interference required to run a course

DogBot the RoboDog

Inspired by this robot...


Figure 1. The target Robot. This is a pretty cool home guard dog...


I created this...


I got a cheap R/C model for a body... Did I mention the goal was to build a companion and/or a guard dog that wanders the house, and sleeps a lot? Hey, I wanted a dog... So the first stage was to get the dog to be autonomous.


Figure 2. Dog Bot Starts to come alive on the work bench.


DogBot operates with several different motivations:

1. Starts in sniff and explore mode where DogBot "drags" itself around by scanning sensors and moving toward the largest object...

2. It will revisit the largest object and move toward it, until the object is too close, DogBot moves back twice as far as before. If a rescan shows no objects are close, DogBot goes into wander mode where it moves toward the open space.

3. DogBot will also wall follow, avoiding major objects, just running around looking at/for things to sniff around.

4. DogBot goes to the light or noise as an overall strategy...


Figure 3. This is the first stage "finished" model dog DOGBOT !

In DogBot's first incarnation, it was powered by a picAxe m14 chip. I had a lot of trouble with this thing, but eventually got it to do a few things, but I wanted more, so I kept upgrading...


This is the picAxe 18x model... I'm testing the motor drive here, it's simple but always hopeful for the budding roboticist...


And then things improved... First step.. Get it to "sniff around", next step, get it to find an open spot while avoiding crashing into things... The tests:


Now DogBot would look around, find an open spot and take off... While running around though, he would be looking to see if he was going to crash into something...

'

Getting through the door was a problem because DogBot would find the opening, but when he started through, his over sensitive IR detectors would make him run away from the door opening... Like this:


But eventually, DogBot became a free-ranging hound. There are things about DogBot I don't like, the least of which is the batteries don't hold up because the motor is a cheapy that sucks current like crazy (it did when it was a radio controlled car too.)

So someday, I want to take DogBot's head and transplant it to another platform. One that can go for walks with me... I'm not there yet, but DogBot did pass the door test and he does have interesting behaviors that are fun to watch and deal with...

The completed roboDog, DogBot, passes the robot household test in this YouTube Video: